

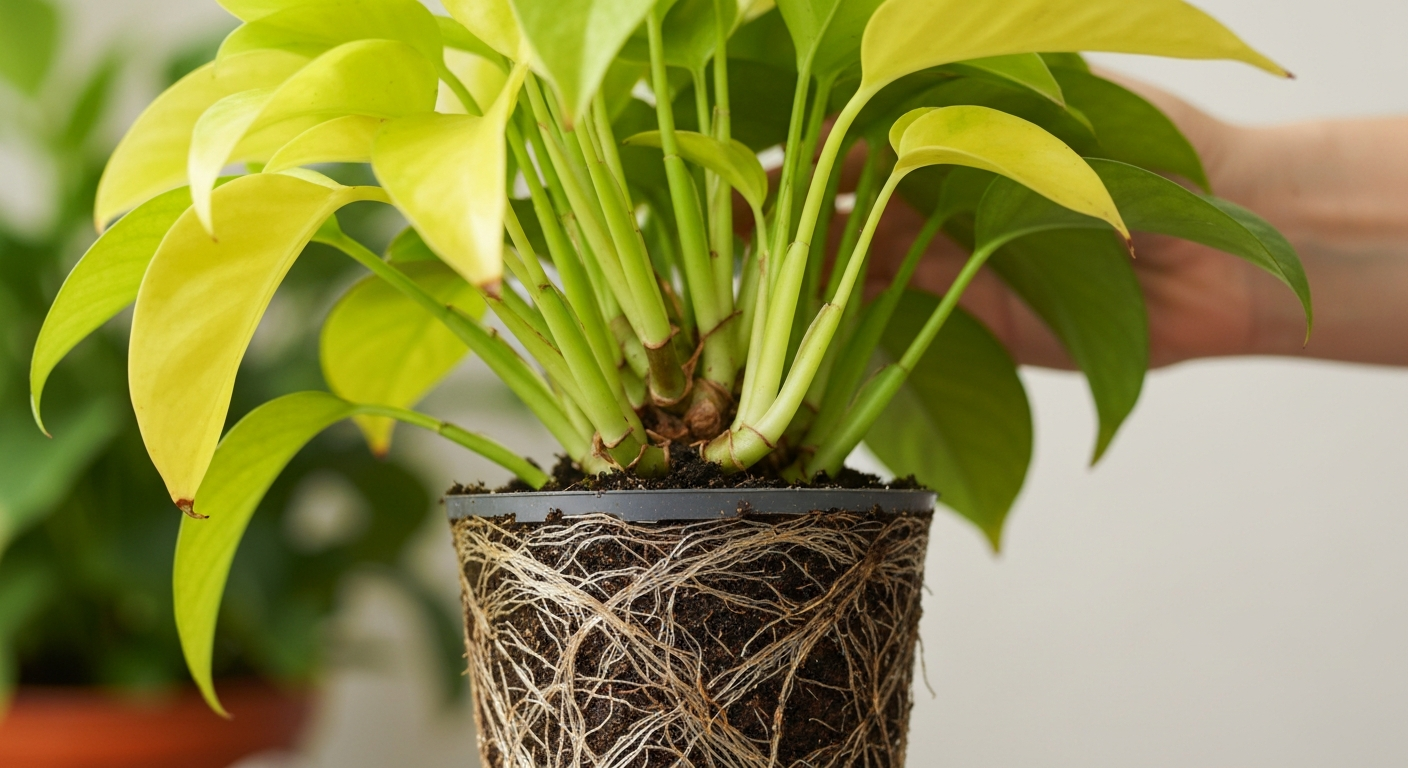
Discovering that your beloved houseplant is suffering can be disheartening, especially when the culprit is something as insidious as houseplant root rot. This common ailment, often unseen until it’s quite advanced, is the number one killer of indoor plants. But don’t despair! As Senior Plant Care Editor at plantdiseaseapp.com, I’m here to equip you with the knowledge and practical steps needed to identify, treat, and most importantly, prevent this destructive disease. Understanding root rot is the first step towards transforming your brown thumb into a vibrant green one.
What is Houseplant Root Rot?
At its core, root rot is a condition where the roots of your plant begin to decay due to an excess of moisture and a lack of oxygen in the soil. This creates an anaerobic environment, perfect for the proliferation of various fungal and oomycete pathogens (like Phytophthora and Pythium species) that attack and destroy root tissue. Healthy roots are firm, white, or light tan, and smell earthy. Rotted roots, however, become soft, mushy, dark brown or black, and often emit a foul, sulfuric odor. Once the roots are compromised, they can no longer effectively absorb water and nutrients, leading to a cascade of problems that affect the entire plant.
Recognizing the Red Flags: Symptoms of Root Rot
Spotting root rot early can be challenging because its symptoms often mimic other plant problems, such as underwatering or nutrient deficiencies. However, a keen eye and understanding of your plant’s normal behavior can help you catch it before it’s too late. It’s important to remember that root rot symptoms almost always appear above ground first, even though the problem lies beneath the soil. For a broader understanding of general plant ailments, you might find our guide on how to diagnose plant problems helpful.
Above-Ground Symptoms
- Wilting or Drooping Leaves: This is often the most confusing symptom. Your plant looks thirsty, even though the soil is wet. This is because damaged roots can’t take up water.
- Yellowing Leaves: Leaves may turn yellow, often starting from the lower leaves and progressing upwards. This can sometimes be accompanied by browning at the tips or edges.
- Stunted Growth: The plant stops growing or shows very slow, weak growth.
- Soft or Mushy Stems/Base: The stem near the soil line may feel soft, mushy, or discolored (dark brown/black). In severe cases, the entire stem can become compromised.
- Leaf Drop: Leaves may fall off easily, often after turning yellow or brown.
- Brown Spots or Patches: While less common than general yellowing, you might observe unusual brown spots on plant leaves, indicating distress.
- Overall Lack of Vigor: The plant simply looks unwell, lacking its usual vibrancy. If you’ve ever wondered if your plant is a sick plant, root rot is a prime suspect.
Below-Ground Symptoms
These are the definitive signs, but require unpotting your plant.
- Dark, Mushy Roots: Healthy roots are typically white or tan and firm. Rotted roots are brown, black, soft, and easily break apart.
- Foul Odor: A distinct, unpleasant smell, often described as rotten eggs or sulfur, emanating from the soil or roots. This is a strong indicator of anaerobic decay.
- Lack of Feeder Roots: The fine, hair-like roots responsible for absorbing water and nutrients will be absent or decayed.
Table: Root Rot Symptoms Checklist
| Symptom Category | Specific Symptom | Description |
|---|---|---|
| Foliage | Wilting/Drooping Leaves | Plant looks thirsty despite wet soil. |
| Yellowing/Browning Leaves | Often starts from lower leaves, sometimes with crispy edges. | |
| Stunted Growth | Plant stops growing or new growth is weak. | |
| Leaf Drop | Leaves fall off easily. | |
| Stem | Soft/Mushy Stem Base | Stem near soil line feels squishy, discolored. |
| Roots | Dark, Mushy Roots | Unpotting reveals brown/black, soft, decaying roots. |
| Foul Odor from Soil/Roots | Distinct rotten smell. | |
| Overall | Lack of Vigor | Plant looks generally unhealthy and weak. |
The Root Causes: Why Root Rot Happens
Understanding why root rot occurs is crucial for both treatment and prevention. It almost always boils down to environmental factors that create an unsuitable habitat for healthy root growth.
Overwatering: The Primary Culprit
This is by far the most common cause of root rot in houseplants. When you water too frequently or give too much water, the soil remains saturated for extended periods. This deprives the roots of oxygen, literally suffocating them. Once oxygen levels drop, beneficial soil microbes die off, and harmful anaerobic bacteria and fungi thrive, leading to decay.
Poor Drainage
Even if you water correctly, poor drainage can lead to root rot. This can be due to:
- Pots without Drainage Holes: A death sentence for most houseplants. Excess water has nowhere to go.
- Blocked Drainage Holes: Debris or roots can block the hole, causing water to pool at the bottom.
- Drainage Layer Myth: Adding gravel or pottery shards at the bottom of a pot actually hinders drainage by creating a “perched water table,” keeping the soil above it wetter for longer.
Incorrect Potting Mix
Using a heavy, dense potting mix that retains too much moisture is a recipe for disaster. Garden soil, for instance, is too compact for most houseplants and will quickly lead to waterlogging. Houseplants need a light, airy mix that drains well and allows for good aeration.
Pot Size Issues
- Pot That’s Too Large: A pot that is significantly larger than the plant’s root ball holds an excessive amount of soil. This extra soil retains more moisture than the plant can absorb, leading to prolonged wetness and anaerobic conditions.
- Pot That’s Too Small (Less Common for Rot): While a too-small pot can cause other issues, it’s less likely to cause root rot unless the plant becomes severely root-bound, preventing proper water distribution and potentially leading to uneven moisture pockets.
Contaminated Tools or Soil
Though less common for indoor plants, sharing contaminated tools (like pruning shears) or using non-sterilized soil can introduce fungal pathogens. Always clean your tools between plants and use fresh, sterile potting mix.
Diagnosing Root Rot: A Step-by-Step Approach
Accurate diagnosis is key to successful treatment. Don’t just guess; follow these steps to confirm your suspicions. For a general overview of plant diseases, refer to our article on plant disease.
- Observe Above-Ground Symptoms: Start by carefully noting all the visible signs: wilting, yellowing, stunted growth, etc. Does the soil feel wet even though the plant looks thirsty? This is a strong clue.
- The “Sniff Test”: Gently poke your finger into the soil. If you detect a foul, sulfuric, or rotten smell, it’s a major indicator of anaerobic activity and root decay. Healthy soil smells earthy and fresh.
- Gentle Unpotting: This is the most definitive step.
- Lay the plant on its side.
- Gently slide the plant out of its pot, supporting the base of the stem.
- Shake off some of the loose soil to expose the roots.
- Inspect the roots: Are they dark, mushy, and crumbling? Do they smell bad? Or are they firm, white/tan, and healthy?
- Using the Plant Disease Identifier App: If you’re unsure after visual inspection, take clear photos of the symptoms—both above-ground and the exposed roots. You can then use your Plant Disease Identifier app on your iPhone to get an instant analysis and potential diagnosis. While AI provides informational insights, always cross-reference with your own observations.
Emergency Treatment: How to Save Your Plant
If you’ve confirmed root rot, swift action is essential.
Immediate Action: Unpotting and Pruning
- Unpot the Plant: Gently remove the plant from its pot.
- Remove Old Soil: Carefully brush away as much of the old, potentially contaminated soil from the roots as possible. You can gently rinse the roots under lukewarm water to help.
- Inspect and Prune Rotted Roots: Using clean, sharp scissors or pruners (sterilized with rubbing alcohol), carefully cut away all affected roots. Look for roots that are black, brown, soft, or mushy. Cut back to healthy, firm, white/tan root tissue. Don’t be afraid to be aggressive; it’s better to remove all diseased tissue than leave some behind. If you have to remove a significant portion of the root system, you may also need to prune back some of the foliage to balance the plant’s water demands with its reduced root capacity.
- Sterilize the Pot (or Use a New One): If you’re reusing the original pot, thoroughly clean and sterilize it with a 10% bleach solution or rubbing alcohol to kill any lingering pathogens. Rinse well.
Repotting with Fresh Soil
- Choose the Right Pot: Select a pot that is appropriately sized for the remaining healthy root system. If you removed a lot of roots, you might need to downsize the pot. Ensure it has ample drainage holes.
- Use Fresh, Well-Draining Potting Mix: This is critical. Use a sterile, high-quality potting mix designed for houseplants, often containing perlite, bark, or coco coir for enhanced drainage and aeration. Avoid using garden soil or old, used potting mix.
- Repot: Place a layer of fresh potting mix at the bottom of the clean pot. Center your plant and fill around the roots with more fresh mix, gently firming it down. Don’t pack it too tightly.
- Initial Watering (Carefully): After repotting, water lightly. The goal is to settle the soil around the roots, not to saturate it. Allow excess water to drain completely.
Post-Treatment Care
- Avoid Overwatering: This is the most important step for recovery. Allow the soil to dry out more than usual between waterings. Stick your finger 1-2 inches deep into the soil; only water when it feels dry.
- Provide Good Air Circulation: Ensure the plant is in an area with good air movement.
- Avoid Fertilizing: Do not fertilize a recovering plant. Its roots are too fragile to handle the nutrients. Wait until you see clear signs of new, healthy growth.
- Patience: Recovery takes time. Don’t expect immediate results. Continue to monitor your plant closely.
Organic Treatments and When Fungicides Might Help
While cultural practices are the cornerstone of root rot treatment, some additional measures can be considered.
Organic Solutions
- Hydrogen Peroxide: A diluted solution of 3% hydrogen peroxide (1 part hydrogen peroxide to 2 parts water) can be used as a soil drench. It releases oxygen, which can help aerate the soil and kill some anaerobic bacteria and fungal spores. Use sparingly, as overuse can harm beneficial microbes.
- Cinnamon Powder: This common spice has natural antifungal properties. After pruning roots, you can lightly dust the cut ends with cinnamon powder before repotting to help prevent further fungal growth.
- Beneficial Microbes: Some products contain beneficial fungi (like Trichoderma) or bacteria that can outcompete harmful pathogens and promote root health. These are typically used preventatively or as part of a recovery regimen.
Understanding Fungicides (and Their Limitations)
For houseplants, fungicides are generally a last resort and often unnecessary if cultural practices are corrected.
- When to Consider: If you’ve tried all cultural methods, and the problem persists, or if you’re dealing with a highly susceptible, valuable plant and suspect a specific, aggressive fungal pathogen, you might consider a fungicide.
- Types: There are various types of fungicides, some targeting specific pathogens. Systemic fungicides are absorbed by the plant, while contact fungicides protect the surface.
- Important Considerations:
- Identification: Fungicides are most effective when you know the specific pathogen. Without a lab diagnosis, this is difficult.
- Effectiveness: Most fungicides primarily prevent fungal growth, rather than curing existing rot. They won’t bring dead roots back to life.
- Safety: Always read and follow product labels precisely, paying attention to safety precautions, application rates, and environmental impact. Use in a well-ventilated area.
- Not a Substitute: Fungicides are never a substitute for proper watering, drainage, and potting mix. If you don’t fix the underlying environmental issues, root rot will return.
Prevention is Key: Stop Root Rot Before It Starts
The best way to deal with houseplant root rot is to prevent it from happening in the first place.
Proper Watering Techniques
- Check Soil Moisture: Don’t water on a schedule. Instead, feel the soil. Stick your finger 1-2 inches deep; if it feels dry, it’s time to water. For larger pots, a moisture meter can be helpful.
- Water Thoroughly, Then Drain: When you do water, water deeply until water flows out of the drainage holes. This ensures all roots get moisture.
- Empty Saucers: Never let your plant sit in standing water. Always empty drainage saucers within 15-30 minutes after watering.
- Know Your Plant’s Needs: Different plants have different watering requirements. Cacti and succulents need less frequent watering than a tropical fern. Research your specific plant’s needs.
Choosing the Right Pot and Potting Mix
- Pots with Drainage Holes: Always, always use pots with drainage holes. If you love a decorative pot without holes, use it as a cachepot (a decorative outer pot) and keep your plant in a nursery pot with drainage inside.
- Appropriate Pot Size: Repot only when necessary, and choose a pot that is only slightly larger (1-2 inches in diameter) than the current one.
- High-Quality, Well-Draining Potting Mix: Invest in a good quality, sterile potting mix specifically formulated for houseplants. Many contain perlite, vermiculite, or bark to improve drainage and aeration. For specific plants like orchids or succulents, use specialized mixes.
Ensuring Good Air Circulation
- Don’t Crowd Plants: Give your houseplants space to breathe. Good air circulation helps the soil surface dry out and reduces humidity around the foliage, which can also prevent other issues like powdery mildew on plants.
- Consider a Fan: In humid environments or crowded plant spaces, a small oscillating fan can improve air circulation.
Regular Plant Health Checks
- Inspect Regularly: Make it a habit to regularly inspect your plants for any signs of distress. Catching issues early, like those described in our article on leaf spot disease, can save your plant.
- Learn Your Plant’s Normals: Understand what your specific plant looks like when it’s healthy. This makes it easier to spot deviations.
Common Mistakes to Avoid
Even experienced gardeners can make mistakes. Here are some common pitfalls when dealing with houseplant root rot:
- Ignoring Early Symptoms: Hoping the problem will go away on its own almost guarantees failure. Act immediately when you suspect an issue.
- Watering on a Schedule, Not by Need: This is the most frequent mistake. A set watering schedule doesn’t account for environmental factors like humidity, temperature, or plant growth, all of which affect water needs. Always check the soil.
- Using the Wrong Soil: Repotting with heavy garden soil or old, depleted potting mix will likely lead to a recurrence of root rot.
- Over-Fertilizing a Stressed Plant: A plant battling root rot is already under immense stress. Fertilizers contain salts that can further burn damaged roots and hinder recovery. Wait until the plant shows clear signs of new, healthy growth before resuming a light fertilization schedule.
- Not Sterilizing Tools: Using unsterilized tools can spread pathogens, not just for root rot but for other issues like black spot on roses if you move between different types of plants.
When to Give Up (and Learn from It)
Sometimes, despite your best efforts, a plant is too far gone. If the entire root system is a mushy mess, and the stem is severely compromised, the chances of recovery are slim to none. It’s okay to let go. Use it as a learning experience:
- What could you have done differently?
- Was the pot or soil appropriate?
- Did you water correctly?
Every plant loss offers a valuable lesson that will make you a better gardener in the future.
Conclusion
Houseplant root rot is a formidable foe, but with careful observation, prompt action, and consistent preventative care, you can protect your indoor green companions. Remember, most plant problems stem from environmental factors, and by mastering the art of proper watering, choosing the right soil and pot, and maintaining good hygiene, you’ll create a thriving environment for your houseplants. Keep an eye on your plants, learn their unique needs, and don’t hesitate to use tools like the Plant Disease Identifier app when you need a little extra help. Happy gardening!
Disclaimer: The information provided in this article is for general educational and informational purposes only, and does not constitute professional agricultural or medical advice. While our Plant Disease Identifier app utilizes advanced AI to provide helpful insights, it is designed as an informational tool and should not replace advice from a qualified agricultural expert or professional gardener. Always consult with a professional for specific diagnoses and treatment plans for your plants.
Related Topics: For more insights into common houseplant issues and other plant problems, visit our hub on Houseplant Problems.